In order to distribute your iPhone OS application, the Team
Agent is required by Apple to create an iPhone Distribution
Certificate. Only the Team Agent for your team will be able to create
this certificate and only this certificate will enable application
submission.
Afin de distribuer votre application iPhone
OS, l'agent de l'équipe est tenue par Apple pour créer un certificat de
distribution iPhone. Seul l'agent de l'équipe pour votre équipe sera capable de
créer ce certificat et que ce certificat permettra de dépôt des
demandes.
Generating a Certificate Signing
Request
Génération
d'une demande de signature
To request an iPhone Distribution Certificate, you first
need to generate a Certificate Signing Request (CSR) utilizing the
Keychain Access application in Mac OS X Leopard. The creation of a CSR
will prompt Keychain Access to simultaneously generate your public and
private key pair establishing your iPhone Distribution identity. Your
private key is stored in the login Keychain by default and can be
viewed in the Keychain Access application under the
‘Keys’ category. To generate a CSR:
Pour
demander un certificat de distribution de l'iPhone, vous devez d'abord
générer une demande de signature (CSR) en utilisant l'application
Trousseau d'accès de Mac OS X Leopard. La
création d'un CSR invite Trousseau d'accès pour générer simultanément
votre public et privé paire de clés d'établir votre identité
Distribution iPhone. Votre clé privée est stockée dans le trousseau de
connexion par défaut et peuvent être affichées dans l'application
Trousseau d'accès sous la catégorie «Keys». Pour
générer un CSR:
- In your Applications folder, open the Utilities folder
and launch Keychain Access.
Dans votre dossier
Applications, ouvrez le dossier Utilitaires et lancez Trousseau d'accès.
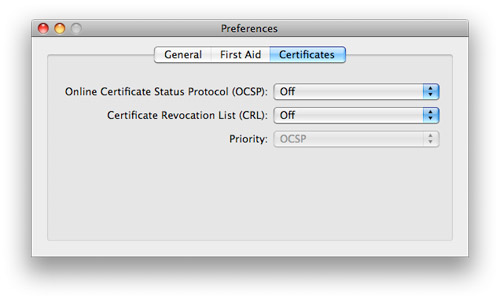
- In the Preferences menu, set Online Certificate Status
Protocol (OSCP) and Certificate Revocation List (CRL) to
“Off”.
Dans le menu Préférences, définissez Online Certificate
Status Protocol (OSCP) et Liste des certificats révoqués (LCR) à "Off".
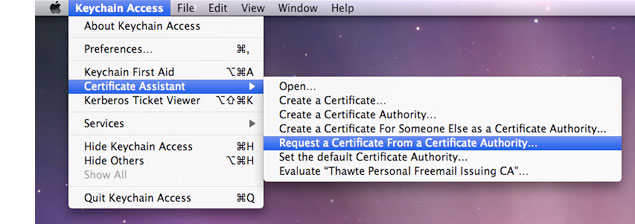
- Choose Keychain Access -> Certificate Assistant
-> Request a Certificate from a Certificate Authority. Note: If
you have a private key highlighted in the Keychain during this process,
the resulting Certificate Request will not be accepted by the
Provisioning Portal. Confirm that you are selecting “Request
a Certificate From a Certificate Authority...” and not
selecting “Request a Certificate From a Certificate Authority
with <Private Key>…”
Choisissez
Trousseau d'accès -> Certificat Assistant -> Demander un
certificat d'une autorité de certification. Note: Si vous avez une clé privée, mises en évidence dans le
Trousseau d'accès au cours de ce processus, la suite Demande de
certificat ne seront pas acceptés par le portail Provisioning. Confirmez que vous sélectionnez "Demander un
certificat d'une autorité de certification ..." et ne pas sélectionner
"Demande d'un certificat délivré par une autorité de certification avec
<Private key> ..."
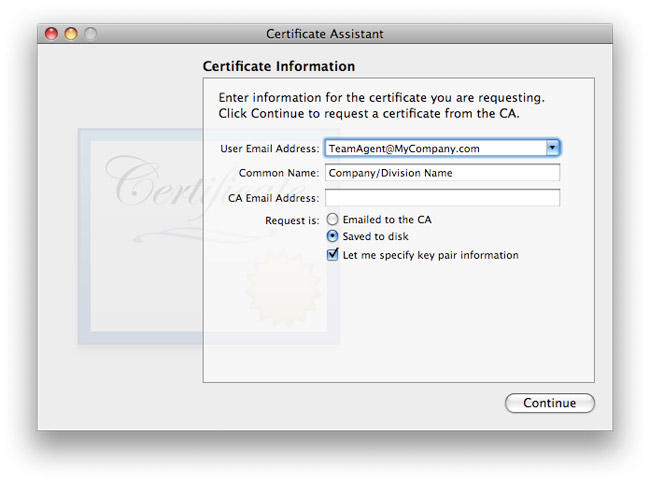
- In the User Email Address field, enter your email
address. Please ensure that the email address entered matches the
information that was submitted when you registered as an iPhone
Developer.
Dans le domaine de l'utilisateur Adresse email, entrez
votre adresse email. S'il vous plaît assurer que l'adresse e-mail indiquée
correspond à l'information qui a été présenté lors de votre inscription
en tant que développeur iPhone.
- In the Common Name field enter your
Company/Organization/Department name. Please ensure that the name
entered matches the information that was submitted when you registered
as an iPhone Developer.
Dans le champ Nom commun
Inscrivez votre entreprise / organisation / Nom du département. S'il vous plaît s'assurer que le nom
entré correspond à l'information qui a été présenté lors de votre
inscription en tant que développeur iPhone.
- No CA Email Address is required.
N ° CA
Adresse de courriel est requise.
- Select the ‘Saved to Disk’ radio
button and if present, select ‘Let me specify key pair
information’ and click ‘Continue’.
Sélectionnez le bouton radio 'enregistrées sur le disque
"et s'il est présent, sélectionnez" Permettez-moi de spécifier des
informations paire de clés "et cliquez sur« Continuer ».
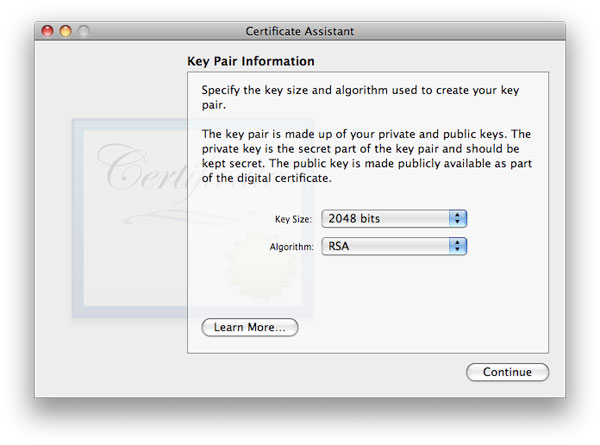
- If ‘Let me specify key pair’ was
selected, specify a file name and click ‘Save’. In
the following screen select ‘2048 bits’ for the Key
Size and ‘RSA’ for the Algorithm. Click
‘Continue’.
Si «Permettez-moi de préciser
paire de clés» a été sélectionné, spécifiez un nom de fichier et cliquez
sur «Enregistrer». Dans l'écran suivant sélectionnez
bits '2048 'pour la taille de clé et «RSA» pour l'algorithme. Cliquez
sur «Continuer».
- The Certificate Assistant will create a CSR file on your
desktop.
Le certificat d'assistant créera un fichier CSR
sur votre bureau.
Submitting a Certificate Signing
Request for Approval
Soumission d'une demande de signature d'approbation
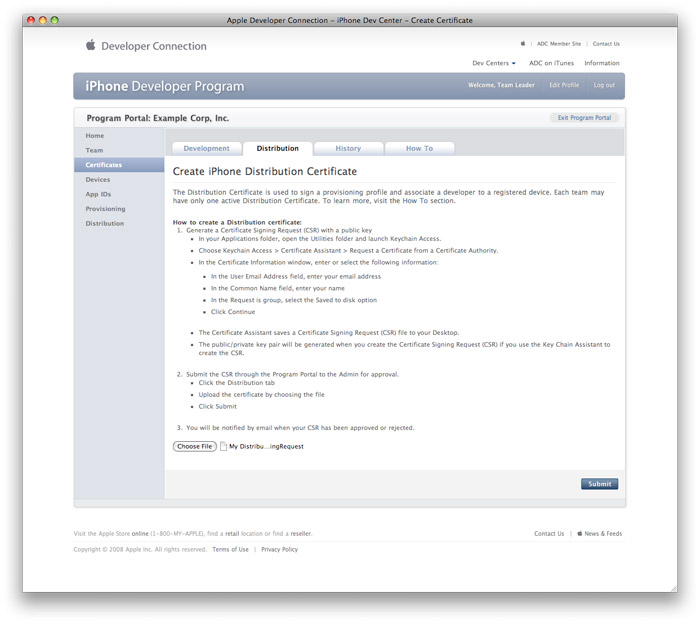
- After creating a CSR, log in to the iPhone Provisioning
Portal and navigate to ‘Certificates’ ->
‘Distribution’ and click the ‘Add
Certificate’ button.
Après la création d'un CSR,
connectez-vous à l'iPhone de mise en service du portail et de naviguer
sur 'Certificats' -> 'distribution' et cliquez sur le bouton «Ajouter
des certificats».
- Click the Upload file button, select your CSR and click
‘Submit’. If the Key Size was not set to 2048 bits
during the CSR creation process, the Portal will reject the CSR.
Cliquez sur le bouton Envoyer un fichier,
sélectionnez votre RSE et cliquez sur «Soumettre». Si la taille de clé n'a pas été fixée à 2048 bits
durant le processus de création en matière de RSE, le portail pourra
rejeter la RSE.
- Approve your iPhone Distribution Certificate.
Confirmez votre certificat Distribution iPhone.
Downloading and Installing
iPhone Distribution Certificates
Téléchargement et installation de certificats
de distribution iPhone
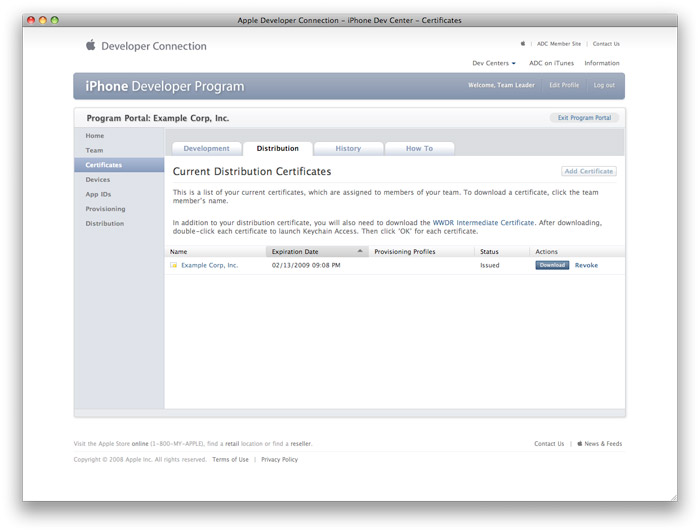
- In the
‘Certificates’-->’Distribution’
section of the Portal, Control-Click the WWDR Intermediate Certificate
link and select “Saved Linked File to Downloads” to
initiate download of the certificate. After downloading, double-click
the certificate to launch Keychain Access and install.
Dans les 'Certificates' -> "distribution": section
du portail, Contrôle-cliquez sur le lien WWDR Intermediate Certificate
et sélectionnez "Saved fichier lié aux téléchargements" pour lancer le
téléchargement du certificat. Après avoir
téléchargé, double-cliquez sur le certificat de lancer Trousseau d'accès
et à installer.
- In the same area of the Provisioning Portal, click on the
name of the iPhone Distribution Certificate to download.
Dans la même zone de la Porte des provisions, de cliquer sur
le nom du certificat de distribution de l'iPhone de téléchargement.
- On your local machine, double-click the downloaded .cer
file to launch Keychain Access and install your certificate.
Sur votre ordinateur local, double-cliquez sur le fichier.
Cer fichier pour lancer Trousseau d'accès et d'installer votre
certificat.
Saving your Private Key and
Transferring to Other Systems
Sauvegarde de votre clé privée et transfert vers d'autres
systèmes
It is critical that you save your private key somewhere safe
in the event that you need to build your application on multiple Macs
or decide to reinstall your system OS. Without
your private key, you cannot sign binaries in Xcode and there you will
be unable to upload your application to the App Store or install your
application on any Apple device. When a CSR is generated,
the Keychain Access application creates a private key on your login
keychain. This private key is tied to your user account and cannot be
reproduced if lost due to an OS reinstall. If you plan to do
development and testing on multiple systems, you will need to import
your private key onto all of the systems you’ll be doing work
on.
Il est
essentiel que vous enregistrez votre clé privée dans un endroit sûr dans
le cas où vous avez besoin pour construire votre application sur
plusieurs Mac ou décidez de réinstaller votre système d'exploitation
système. Sans votre clé privée,
vous ne pouvez pas signer les binaires dans Xcode et il vous sera
impossible de télécharger votre demande à l'App Store ou installer votre
application sur n'importe quel appareil Apple. Quand un RSE est généré, l'application Trousseau
d'accès crée une clé privée sur votre trousseau de connexion. Cette clé privée est liée à votre compte utilisateur et
ne peut être reproduit en cas de perte due à une réinstaller OS. Si
vous prévoyez de faire du développement et des essais sur des systèmes
multiples, vous devez importer votre clé privée sur l'ensemble des
systèmes que vous ferez travailler.
- To export your private key and certificate for
safe-keeping, open up the Keychain Access Application and select the
“Keys” category.
Pour exporter votre clé privée et le certificat pour
mettre en sûreté, d'ouvrir l'application Trousseau d'accès et
sélectionnez les "Keys" catégorie.
- Highlight the private key associated with your iPhone
Distribution Certificate and select “Export Items”
from the ‘File’ menu. Save your key in the Personal
Information Exchange (.p12) file format.
Mettez en surbrillance la clé privée associée à votre
certificat de distribution iPhone et sélectionnez «articles
d'exportation" dans le menu «Fichier». Sauvegarder votre
clé dans l'échange de renseignements personnels (. P12) format de
fichier.
- You will be prompted to create a password which will be
used when you attempt to import this key on another computer.
Vous serez invité à créer un mot de passe qui sera utilisé
lorsque vous essayez d'importer cette clé sur un autre ordinateur.
- You can now transfer this .p12 file between systems.
Double-click on the .p12 to install on a system. You will be prompted
for the password you first entered above.
Vous pouvez maintenant transférer la présente. P12 entre les
systèmes. Double-cliquez
sur le fichier. P12 à installer sur un système. Vous serez invité à
entrer le mot de passe vous êtes entré ci-dessus.